
Here is a fun fact about me. I hardly ever remember what seeds I planted or where planted in the garden. A couple years ago I was fitting in squash anywhere and everywhere that I could. When they finally started popping up I had no idea what squash was actually growing. Every time the plants finally started producing it felt like a gender reveal party. “It’s a butternut!” or “It’s a pumpkin!” Whatever squash made its appearance got used and loved. The butternuts store well dry, and the pumpkins typically get turned into homemade pumpkin puree.
This year I didn’t plant near as many surprise squash seeds. But one I thought I planted for sure was a sugar pie pumpkin. Well, that pumpkin turned out to be a butternut squash, and at harvest time I was thrilled since the homemade pumpkin puree I canned last year was still sitting in the cantry. Until I discovered a delicious way to make pumpkin spice coffee using my puree, and my little one turned into a pumpkin fiend. We also fell in love with the Pumpkin Spice Bars and it became a hit for a tasty dessert. Quickly, our pumpkin supply dwindled.
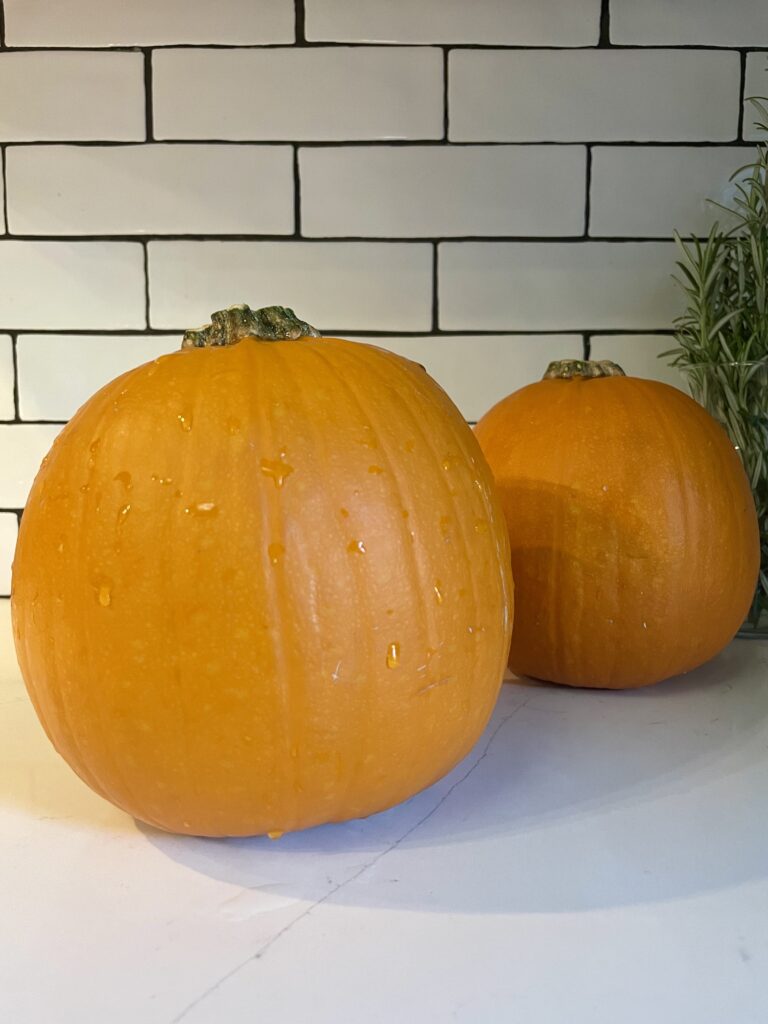
I know I could run to the store and grab a tin can full of ready made puree, but that’s too easy. So instead, I grabbed two small pie pumpkins and made a night of making puree.
How to Make Homemade Pumpkin Puree (the easy way!)
Ingredients
- Pie Pumpkin
Equipment
- Large Knife
- Cutting Board
- Ice Cream Scooper / Large Spoon
Directions for making Easy Pumpkin Puree
- Preheat your oven to 350°F
- Wash your pumpkin(s)
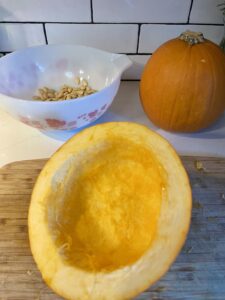
- Carefully chop your pumpkin(s) in half, top half and bottom half, do not try cutting through the stem
- Using your ice cream scooper or large spoon, scoop out all of the seeds and stringy pulp
- Place your pumpkins directly on the oven rack
- Bake for 45 minutes, or until pumpkin can be easily pierced with a fork
- Remove the pumpkin from the oven and let cool for 10-15 minutes
- Carefully peel the skin from the pumpkin, because it’s still gonna be a bit toasty!
- Cut the pumpkin apart and add to a blender, blend on high until smooth
- Store in the fridge for 1 week
How to Make Homemade Pumpkin Puree for Canning
Ingredients for Homemade Canned Pumpkin Puree
- Pie Pumpkin
- Water
Equipment
as an Amazon Associate I earn from qualified purchases (at no extra cost to you!)
- Large knife
- Food peeler
- Cutting board
- Ice Cream scooper / large spoon
- Large Sauce Pan
- Pressure Canner
- Wide mouth pint sized canning jars
- Wide mouth lids & rings
Directions for Canning Homemade Pumpkin Puree
- Fill your canning jars with water and add to your pressure canner
- Add three quarts of water to your pressure canner and bring to a boil, sterilizing the jars inside
- Wash your pumpkin(s)
- Carefully chop your pumpkin(s) in half, top half and bottom half, do not try cutting through the stem
- Using your ice cream scooper or large spoon, scoop out all of the seeds and stringy pulp
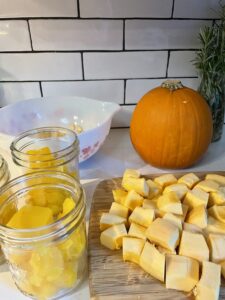
- Peel your pumpkins with a vegetable peeler
- Cut each half in half again
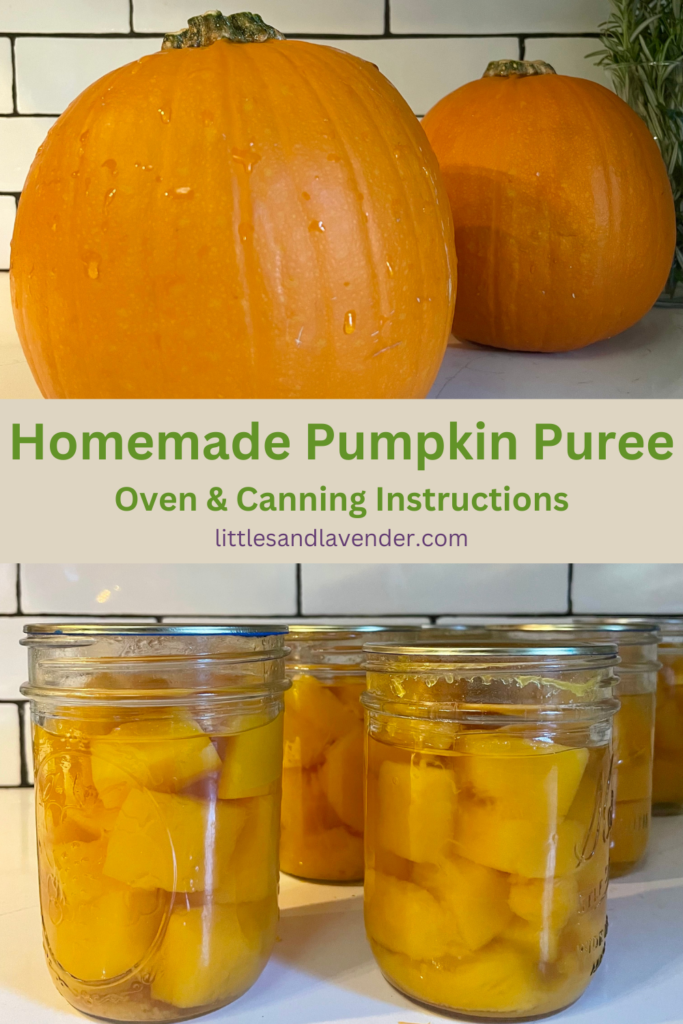
- Carefully cut the quarters of the pumpkin into 1 inch cubes
- Boil water in the large saucepan, once boiling add the pumpkin cubes and boil for 2 minutes
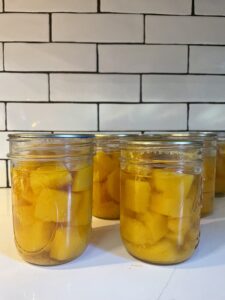
- Immediately drain the pumpkin cubes and add to sterilized canning jars, leaving 1 inch head space
- Boil water and pour over pumpkin cubes, leaving 1 inch head space. Add a pinch of salt if desired
- Clean the rims of the jars with a vinegar soaked cotton ball or paper towel
- Add lids to jar and tighten the rings using the three finger method, not too tight!
- Place your jars into the pressure canner, seal the lid and place on medium high heat
- Once there is a steady flow of steam being released from the canner set a timer for ten minutes to release the air
- Once the 10 minute timer has ended place your weight / pressure regulator on the vent pipe and bring the pressure up to 5lbs, still at medium high heat
- Turn the stove down to medium and bring the pressure up to 11lbs
- Once the pressure is at 11lbs set a timer for 55 minutes (this is for pints only, if you are using quarts process for 90 minutes)
- When you are pressure canning you need to stay nearby and keep a watchful eye on the pressure. If the gauge drops below 11lbs you will need to restart the timer for processing. Adjust the heat on your stove as necessary. I have an induction stovetop and typically alternate between 4-6 to keep a stable pressure.
- Once the timer goes off turn off your stove and weight for the pressure to drop before removing the pressure regulator / weight
- Remove jars from canner and let sit for 12-24 hrs before removing the rings to test the seal
- Store for 12-18 months (usually depending on your lids)
Once you’re done making your pumpkin puree learn how to turn it into something delicious! Make some Pumpkin Pie Bars to impress your friends and family over the holidays.
NOTES:
I use wide mouth canning jars for a specific reason. When I am ready to use my puree I drain the water from my jars and use my immersion blender to easily blend the cubes into the final puree.
I couldn’t remember how many pumpkins I actually processed last year, so I sterilized as many jars that would fit in my pressure canner. Eight jars fit on the bottom without using the second rack, so I used one and a half pie pumpkins to make 8 pint sized jars.
Next year I will definitely be growing my own pie pumpkins to can up! Even one plant can give you more than enough pie pumpkins for your pumpkin spice cravings and to satisfy your hungry babies.
What do you think?